


Part 3: Final Assembly and First Flex Test
Project SilverDuty: 2001-2010 Chevy 2500 SAS Build Overview
In Part 1, I removed the factory IFS and prepped the frame for this GMT800 Chevy 2500 solid axle swap. In Part 2, I built and installed the main Chevy SAS kit components, including the frame plates, coil buckets, transmission crossmember, radius arms, and panhard bar.
Part 3 covers the remaining mechanical work needed to get the truck back on its tires and moving under its own power. That includes converting the Super Duty Dana 60 wheel pattern, welding the front differential, installing the steering, replacing the ball joints, connecting the brakes and front driveshaft, and completing the first suspension flex test.
This is Part 3 of my Chevy 2500 solid axle swap build series:
- Part 1: IFS Removal and Frame Prep
- Part 2: SAS Kit Installation
- Part 3: Back on Tires After 6 Months
- Part 4: Final Setup and Trail Testing – Coming Soon
In this guide:
- Redrilling the Super Duty Dana 60 Unit Bearings and Rotors
- Welding the Dana 60 Differential
- Installing the Steering System
- Replacing the Super Duty Dana 60 Ball Joints
- Exhaust and Front Driveshaft Clearance
- Installing the Front Driveshaft U-Joint
- Mounting the Front Tires
- Adapting the Brake Lines
- Back on Tires After Six Months
- First Drive and Flex Test
Quick Specs:
- Truck: 2001 Chevrolet 2500 GMT800
- Front axle: 2005-2017 Ford Super Duty Dana 60
- Front suspension: Coil springs with custom radius arms and panhard bar
- Front wheel pattern: Converted from 8×170 to 8×6.5
- Rear axle: Semi-float GM Corporate 14-bolt
- This post covers: final mechanical assembly, first movement, and suspension testing
- Skill level: Experienced DIY; welding, drilling, fabrication, steering, and brake work required
Missed the fabrication work? Start with Part 1: IFS Removal and Frame Prep, followed by Part 2: Chevy SAS Kit Installation.
The suspension and mounting system used throughout this build is based around my Chevy 2500 SAS kit. The complete kit and individual brackets are available in my shop.
Photos throughout this guide are taken directly from the Part 3 build video. This post contains affiliate links. If you purchase through them, I may earn a small commission at no extra cost to you.
Watch the complete Part 3 build video below to see the mechanical work, steering setup, first drive, and suspension flex test.

Watch the full video above, then continue below for written notes and links to the parts and detailed technical guides used during this stage of the Chevy 2500 solid axle swap.
Tools and Parts Used in Part 3
- 19/32″ drill bit for the new wheel stud holes
- 13/16″ drill bit for enlarging the brake rotor holes
- Rapid Tap
- 7-degree, 1.5-inch-per-foot tapered reamer
- Pitman arm puller
- Orion 21 piece ball joint press kit
- Spicer 5-3205X conversion U-joint
- Dorman 785-434D brake line adapters
- Shop My Recommended Gear
Redrilling the Super Duty Dana 60 Unit Bearings and Rotors

Redrilling the Super Duty Dana 60 unit bearings from 8×170 to 8×6.5.
The 2005-2017 Super Duty Dana 60 uses an 8×170 wheel pattern, while the rear axle and wheels on this truck use 8×6.5. You do not have to redrill the front axle to complete the swap, but converting it allows matching wheels to be used on the front and rear.
I redrilled the unit bearings using a drill template I created and plasma cut out of 1/4″ steel that indexes off the original studs. The new holes were drilled to 19/32″, and the original studs were moved into the new 8×6.5 pattern.
The brake rotors also needed additional clearance for the relocated studs. I enlarged the rotor holes with a 13/16″ drill bit so they would slide over the converted unit bearings.
If you are doing the same conversion, you can get my Super Duty Dana 60 drill template and drill bit here.
For the complete procedure, read my Super Duty Dana 60 8×170 to 8×6.5 conversion guide or watch the detailed video below.

Welding the Super Duty Dana 60 Differential

Welding steel plates into the Super Duty Dana 60 differential.
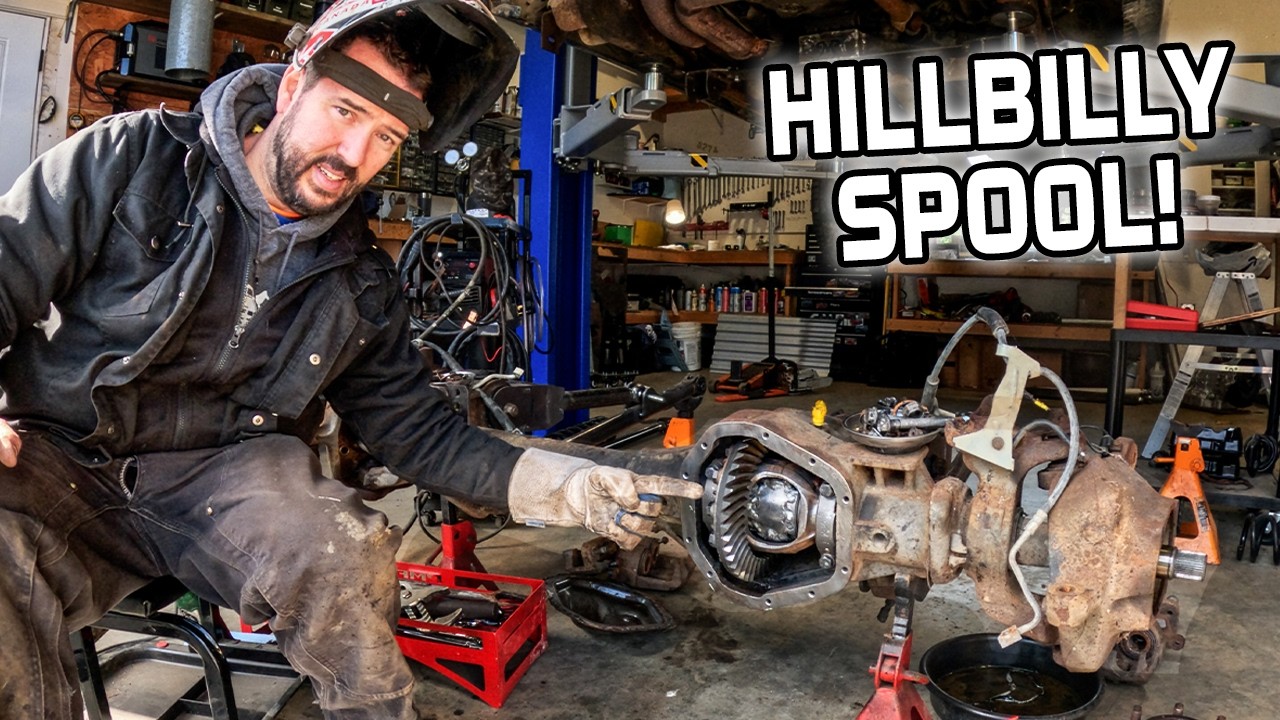
Before putting the front axle back together, I opened the Dana 60 differential and welded the spider gears.
A selectable locker, mechanical locker, or spool would be a better long-term option, but they would also add considerably more cost to this budget trail build.
I used two pieces of 1/4″ steel plate fitted between the spider gears. The plates give me more material to weld to while also mechanically wedging the gears together.
You can cut plates yourself or get my Super Duty Dana 60 weld plates here.
For the complete cleaning, fitting, and welding process, read my Dana 60 differential welding guide or watch the dedicated video below.
Installing the Steering System

Reaming Chevy Pitman arm to fit Ford drag link
I’m still not settled on how I want my steering to work, but in the interest of keeping the cost down and in using parts I already have I opted to use the stock Ford crossover steering and modify it to connect to the Chevy steering box. It hangs lower than a proper high-steer system, but using factory parts keeps the initial cost down and gets the truck working while I test the rest of the swap.
The main problem was connecting the Ford drag link to the Chevy steering box. Both factory parts use a tapered tie-rod end, so the Ford drag link cannot attach directly to the stock Chevy pitman arm.
After removing the original Chevy pitman arm, I sourced a four flatspot pitman arm from a 2005 GMC Savana. The Savana arm is the correct length but it is not a drop arm, it actually goes upwards 1″ so I’m not yet sure how well it will work without binding. To connect the Ford drag link to the GMC pitman arm I needed to ream the tapered hole in the arm larger. I picked up a 7* ream and it made quick work of enlarging the hole in my $13 pitman arm!
This setup still needs to be tested through the full suspension and steering range. The drag-link angle may require a different pitman arm or a proper high-steer system once the truck is driven and flexed further.
Replacing the Super Duty Dana 60 Ball Joints

The worn and seized Super Duty Dana 60 ball joints needed to be replaced before reassembly.
The Dana 60 ball joints were badly worn and seized, so they needed to be replaced before the axle could go back together.
Since the unit bearings, axle shafts, and steering knuckles were already removed for the wheel-pattern conversion, this was the right time to replace all four ball joints and inspect the axle-shaft U-joints.
For the complete removal and installation procedure, read my Super Duty Dana 60 ball joint replacement guide or watch the detailed video below

Exhaust and Front Driveshaft Clearance
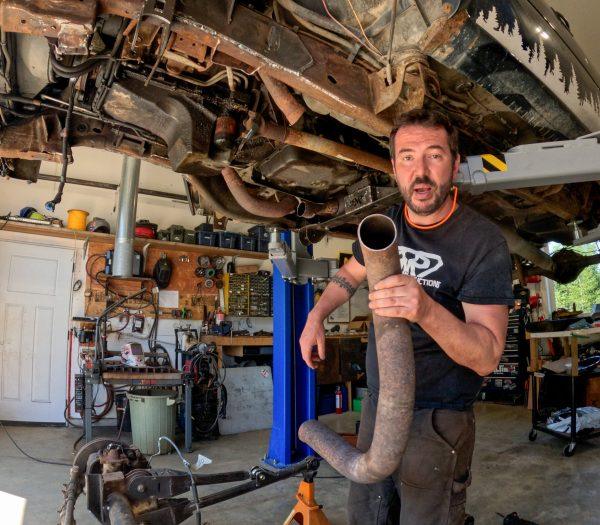
The factory exhaust crossover interfered with the new front driveshaft location.
The factory exhaust crossover ran directly through the space needed by the front driveshaft. With more suspension travel the driveshaft moves a lot further with a solid front axle and the stock Chevy exhaust was right in the way.
I cut out and removed the interfering section so I could install the driveshaft and flex the suspension properly.
I’ll reroute and finish the exhaust during Part 4 after I’ve set the bump stops and limiting straps and know final clearances. This is one of the reasons I did not fully weld every suspension bracket during Part 2. The truck needed to be flexed and checked for clearance before everything was made permanent.
Installing the Front Driveshaft U-Joint

Installing the conversion U-joint between the Chevy driveshaft and Ford Dana 60 yoke.
The original Chevy front driveshaft and the Ford Dana 60 pinion yoke use different U-joint sizes.
I connected the two using a Spicer 5-3205X conversion U-joint. It has the correct cap dimensions for the Chevy S44 U-joint with internal snap rings on one axis and the larger Ford 1350 size with external snap rings on the other.
This allowed me to reuse the factory Chevy driveshaft for the initial mockup and flex testing. I still need to check the slip travel and clearances through the complete suspension range before deciding whether building a custom driveshaft is on my list.
Front driveshaft U-joint: Spicer 5-3205X conversion U-joint
Mounting the Front Tires

Using Ether to mount the 17″ tire on the aluminum rim.
With the unit bearings and brake rotors converted, I could finally install the 8×6.5 wheels and front tires. After converting the unit bearings from the 8x170mm to the matching 8×6.5 pattern as the rear I found some rims outside in the yard to put on the front axle. The Ford Super Duty axle has massive brake calipers so you need 17″ or larger rims to fit over the brakes. The tires are two 305/75r17 BFG All-terrains, a “matching” set, a KO and a KM2.
These tires are not great but the key feature with them is that they are 4″ smaller than the 40″ Trepadors that I’ll be putting on the rear of the truck. The 4″ difference in height is what is needed to make the front 3.73 gear ratio and the rear 4.10 gear ratio match so the transfercase doesn’t bind when put in 4wheel drive.
Adapting the Ford and Chevy Brake Lines

Adapting the Chevy brake lines to the Super Duty Dana 60 brake hoses.
The factory Chevy hard lines and Super Duty brake hoses use different fitting sizes.
I used Dorman 785-434D adapters to connect the Chevy 1/4″ brake lines to the Ford 3/16″ hose fittings. One of the original Chevy fittings was too rusty to reuse, so that section of line also needed a new fitting and flare.
The brakes were connected for the first test drive but still need to be bled and checked.
Brake line adapters: Dorman 785-434D brake line adapters
Chevy SAS Back on Tires After Six Months

After nearly six months on the hoist, the Chevy 2500 was finally supporting its own weight again.
After nearly six months on the hoist, the truck was finally lowered onto the new suspension and back onto its tires.
At this point, the major SAS components were installed:
- Super Duty Dana 60
- Coil buckets and springs
- Radius arms
- Panhard bar and mounts
- Transmission crossmember
- Front steering
- Front driveshaft
- Front brakes
- Converted 8×6.5 unit bearings and wheels
The shocks, bump stops, limiting straps, exhaust, and final welding were intentionally left unfinished. I needed the truck sitting at ride height and moving under its own power before I could flex the suspension and measure those parts properly.
The complete suspension setup is based around my Chevy 2500 SAS kit, with the individual brackets also available separately.
First Time Driving After Six Months

First flex in the Chevy SAS
The first drive was only a slow trip out of the shop and down the driveway.
This was not a completed road test. The brakes, exhaust, shocks, bump stops, limiting straps, steering alignment, and final hardware checks still need to be completed.
Even so, getting the truck moving again was a major milestone. It confirmed that the basic suspension, steering, wheel conversion, and drivetrain combination were working well enough to begin testing clearances.
First Flex Test and Clearance Checks

First flex on the rock to check clearances.
The first flex test took place on the rocks in my driveway.
The goal was not to test maximum articulation. The truck still had no shocks, bump stops, or limiting straps. I only needed to cycle the axle far enough to find obvious interference and take measurements for the remaining suspension parts.
During the test I checked:
- Tire and fender clearance
- Drag-link angle and steering movement
- Panhard bar movement
- Coil spring position
- Front driveshaft clearance
- Brake hose length
- Radius arm clearance
One front tire contacted the fender, which was expected. The steering also needs more testing before I know whether the current pitman arm and drag-link arrangement will work through the full range of travel.
The test gave me the compressed and extended measurements needed to choose shocks, bump stops, and limiting straps instead of guessing before the truck was assembled.
Final Notes on Part 3 of the Chevy 2500 Solid Axle Swap

Back on tires and flexed out after six months of fabrication and mechanical work.
Part 3 was the point where the fabricated SAS components finally became a functioning truck again.
The Dana 60 was assembled, the wheel pattern was converted, the front differential was welded, the steering and brakes were connected, and the truck moved under its own power for the first time in nearly six months.
The first flex test also showed what still needs work and provided the measurements required to finish the suspension properly.
There is still a list to complete, but the major Chevy 2500 solid axle swap components are now installed and working together.
Part 4: Final Setup and Trail Testing
Part 4 will cover the remaining work required to finish the truck and take it onto the trail.
The current punch list includes:
- Finish and bleed the brakes
- Finalize the steering setup
- Reroute and finish the exhaust
- Install shocks
- Install bump stops
- Install limiting straps
- Check brake hose and driveshaft travel
- Finish welding the remaining brackets
- Torque and inspect all suspension hardware
- Address tire and fender clearance
- Complete a proper road and trail test
If you are building your own GMT800 Dana 60 swap, make sure to read Part 1, continue through Part 2, and check out the complete Chevy 2500 SAS kit here.
Safety Disclaimer
Performing a solid axle swap involves cutting, grinding, drilling, welding, steering modifications, brake-system work, and supporting heavy loads. Only attempt this work if you are confident in your mechanical and fabrication skills.
Always use properly rated jack stands, wear appropriate eye and ear protection, keep fire suppression nearby, and disconnect the battery before cutting or welding.
Any modified steering, suspension, braking, axle, or driveline component must be thoroughly inspected and tested before road or trail use. The low-speed movement shown in this project was performed on private property before the truck was fully completed.
You are responsible for your own safety, the condition of your vehicle, and the safety of anyone around you.
Some of the links provided are Amazon Associate affiliate links. I may earn a commission at no extra cost to you.